The frosting decorator press. Now I am not actually 100% sure if this is the one I really bought but if I was going to buy one off of amazon right now this would be the one. They are not too spendy and it is so much easier than frosting by hand or buying the store bought frosting in a tube. You know exactly what is going in your frosting and can change flavors to suit your needs. Wish I wasn't avoiding having cupcakes all the time or I would use this everyday!
Anyways. The birthday party was Mickey Mouse Clubhouse themed, since this is his favorite show. I wanted to make a MMC cake. Well I looked all over Pinterest for ideas and I didn't think I could make any of them. They were all so intricate and required the use of fondant which I have never used. I went to a birthday party last year that had cupcake pull-apart cake and I thought it was really cool. And I love cupcakes. So I decided to go the cupcake route.

Here's what I did:
- Make your cake mix. I did store bought and made two batches.
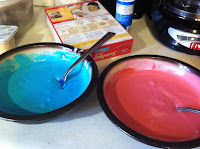
- Separate the batter into three bowls. (One is not pictured. It is the original bowl I am keeping white.)
- I made the batter the colors I wanted. I had to use a lot of food coloring to make it the blue and red that i needed. It took many drops of the coloring I used. I might try to use a different kind next time.
- As soon as they were the vibrant color I wanted (I wish the red was less pink though), I got out my mini muffin pan, sprayed it, and got to work.
- I used a teaspoon or tablespoon to put the colors in each muffin tin. I did this at random and tried to do them each a little differently. More blue in some, red in others, and white in the ones left. When you have completed that they should look something like the picture above.
- I baked them about 10 minutes and repeated the process until all the batter was gone.
- While they were cooling I whipped up my frosting, I believe it was some kind of vanilla butter cream. I put yellow food coloring in it as bold as I could get it and put it in my frosting decorator press. Or what I refer to as my frosting gun.
- I frosted each cupcake individually using just a simple spiral. While I was frosting I started placing them in the shape of a mickey mouse head.
- I also mad a few big cupcakes and put 3 together to make the ears. I had to make them transportable so used 3 plates. I didn't have anything big enough to hold the whole thing.


 This is for the moms who want to do something simple. The only time consuming part was making the cupcakes tie-dyed. Other than that the baking was quick and frosting with the frosting gun took less than 5 minutes to frost 2 boxes of cake worth of mini cupcakes!
 I also made Colton his own little cake that he could use his whole hands to dig in. It turned out pretty good. It was a small round pyrex container and two mini cupcakes for the ears! HOT DOG!
I can't wait to whip out the frosting gun again! Maybe for valentines day :)
Until next time,
-Amanda